Are you tired of spending money on storage services just to share a couple of photos to your loved ones? Are you starting to lose track of all the alternate e-mail accounts you've made signing up for those free trials? Do you miss the early days of MySpace and Tumblr, when you got to show of your HTML and CSS skills? What if we told you that Jami could address all these problems, using the same feature?
🤔 What Is a Shared Service?
In practice, a shared service allows you to share any TCP network service (like a web server, game, etc.) with your contacts through Jami! It can also manage an embedded web server as needed to easily share simple websites or directories.
🤝 Accessing Your Contacts' Services
Accessing shared services exposed by your contacts is easy, but varies depending on the platform with limitations applying to each one.
- Select one of your contacts
- Select the planet icon next to the call button (it's hard to miss it)
- A list will popup of your contact's shared services, simply click one of them to connect to it.
A: Your contact is likely not sharing any services (that you know of 😉)!
🖥️ Desktop
On desktop, if the service is accessible from a web browser, then you will be prompted to exit Jami and taken to your default browser. Otherwise the service's link will be copied to your clipboard.

🤖 Android
Just as it would be on desktop, selecting a web-accessible shared service on the Android version of Jami will open the service in your default browser. Otherwise the link to the service will be copied.

🍎 iOS
On iOS, selecting a shared service will open an integrated browser inside Jami. Note that the planet icon varies slighlty than that of the desktop and Android versions.

🎨 Creating a Shared Service
Creating a shared service in Jami is a simple process, and we invite you to follow along by reading the steps below.
Navigate to Settings → Account → Shared services.
📁 Sharing a Directory
In the shared services settings page, select 🌐 Add Website
🌐 Sharing a Custom Website
In the shared services settings page, select 🌐 Add Website and select a directory. In the directory you've chosen to share, you will need to create an index.html file in its root. You are free to add any other HTML and/or CSS files to your liking. Note that your contacts will always land on the index.html page every time they connect to your services.
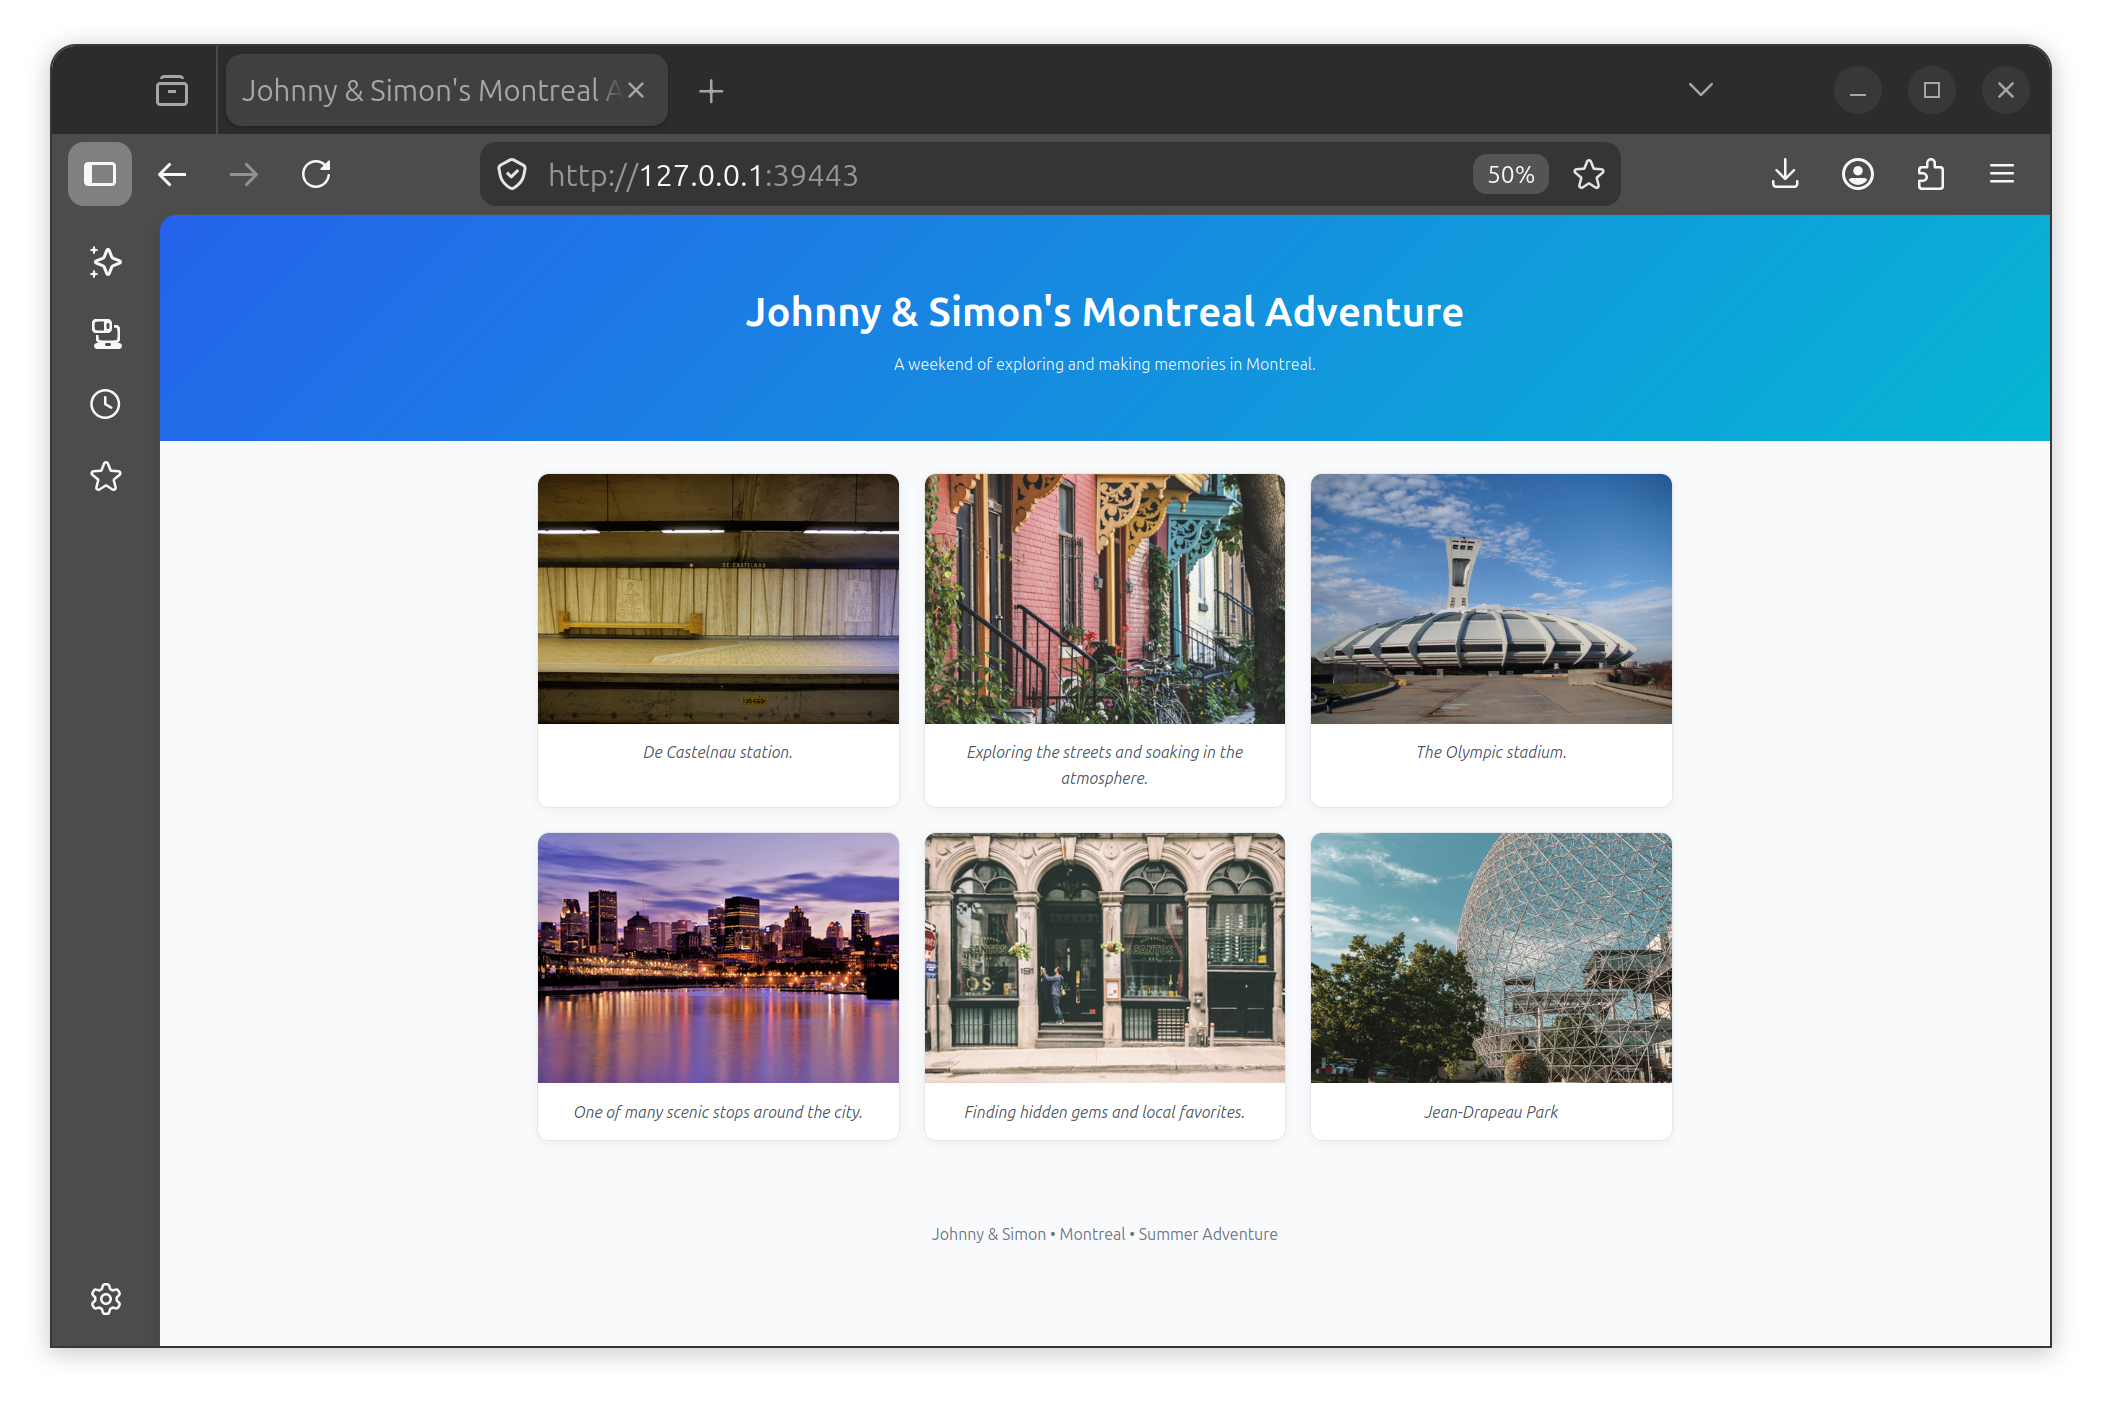
Your friends will be able to access your website as previously described, but if you're a good designer, they'll have a much more pleasant time looking at it. See an example of a customized website below 🌟 .
🕵🏼♂️ Limiting Visibility
Sometimes you don't want everyone to see everything. This is why Jami allows you to select from one of three options of visibility when sharing a service.
- 📒 Contacts: The default visibility. Any contacts that you've confirmed can see the service
- 🌍 Anyone (public): Anyone using Jami can see the service, even those who haven't added you
- 🔒 Specific contacts only: Only specific contacts that you pick from your list of existing contacts can see the service
You can set or modify the visibility of a shared service in the configuration dialog as shown below. You will need to set the Accessible by option to one of the three options above. Should you select specific contacts only, you will then need to add/remove the contacts using the chips in the dialog.
🛠️ Sharing a Custom Service
Jami allows sharing any TCP service with your contacts, not just web pages!
In the shared services settings page, select 🔧 Custom service and configure the service to your liking
⛏️ Demo: Sharing a Minecraft Server on Jami
For this example, we will be hosting and sharing a Minecraft server between two contacts.
👨🏫 Detailed Setup Instructions
-
Create a dedicated folder on your machine for your Minecraft server. For the sake of this demo, we will name the folder
MC Server. -
Download the official
server.jarfile from the Minecraft website and move it to the MC Server folder. -
Run the
server.jarfile you downloaded in Step 1. Windows users can perform the traditional double-click to run. MacOS and Linux users can run the following command in the directory containing theirserver.jarfile:java -Xmx4G -Xms4G -jar server.jar nogui -
Once you've ran the
server.jarfile, you'll see theMC Serverget populated with some additional files. Of these additional files, you will need to modify two.eula.txt: You will need to set theeulavalue toTRUEin this file. Make sure you actually read the EULA prior to agreeing to it!-
server.properties: Use this file to configure your Minecraft server to your liking. You may or may not need to modify the following property:-
Set the
server-portfor your server. You can usually leave this at the default value of25565provided that it's not already in use.
-
Set the
-
Save the files you just modified and rerun the server the same way you did in Step 3. The server is ready once you see the message
Done (XXXs)!. -
Add a custom service to Jami. Make sure to populate the
Local portfields with the same value you set forserver-port. Just like sharing a directory or website, you can also control access to service. Once you're ready, hit save.

-
Make sure you can join the minecraft server yourself before letting your friends know to join it! Inside Minecraft, navigate to Multiplayer → Direct Connection and enter
server-ip:server-portinto theServer Addressfield and hit connect.
If all is well, then you should have successfully joined the server and seen the following message in your server logUSERNAME joined the game. -
Now that you've confirmed your Miencraft server is in fact alive and well, you can now let your contacts know to join the server
- Your contact must open up your shared services list and connect to your Minecraft Server service.
-
The IP will automatically be connected to their clipboards. They must simply paste the copied contents in the
Server Addressfield in their own Minecraft instances.
Ready to Try Shared Services?
Have an Issue with Shared Services?
Our donation campaign
Building Jami is not only about writing code. It also means funding engineering time, testing, support, packaging, and the ability to keep the project independent.
If Jami is useful to you, whether every day or as a reliable alternative when you need it, your donation directly helps maintain this level of quality and accelerate development, without compromising the project’s founding principles.
Credits
Article by Ilyas Erdogan (Jami Team)
Feature image: Village Lawyer painted by Pieter Brueghel the Younger


